mhk2 install manual
Welcome to the MHK2 Installation Manual․ This guide provides comprehensive instructions for installing, configuring, and operating the system․ Ensure safety and effective use by following the steps carefully․
1․1 Overview of MHK2 System
The MHK2 system is a advanced remote control solution designed for Mitsubishi Electric HVAC systems․ It offers seamless wireless communication and intuitive operation․ The system includes a remote controller and receiver, enabling precise temperature control and energy efficiency․ Compatible with various indoor units, the MHK2 enhances comfort and convenience․ This manual provides detailed guidance for proper installation, ensuring optimal performance and safety․ Follow the instructions carefully to achieve a smooth setup and operation․
1․2 Purpose of the Installation Manual
This manual is designed to guide installers and technicians through the installation and setup of the MHK2 system․ It provides step-by-step instructions to ensure a safe and correct installation process․ The manual covers essential topics such as system requirements, wiring, and configuration, ensuring optimal performance․ Intended for HVAC professionals, it serves as a comprehensive resource to achieve a seamless integration of the MHK2 controller with Mitsubishi Electric indoor units, guaranteeing efficient and reliable operation․
1․3 Safety Precautions
Before starting the installation, ensure all power sources are disconnected to prevent electrical shocks․ Always follow proper grounding procedures and use appropriate safety equipment․ Avoid improvising with materials or tools, as this may lead to system damage or safety hazards․ Adhere to local electrical codes and manufacturer guidelines․ Failure to comply with these precautions may result in injury or equipment malfunction․ Ensure all safety measures are strictly followed throughout the installation process․

System Requirements
The MHK2 system requires compatible indoor units, essential tools like screwdrivers, and adherence to environmental conditions for optimal performance․ Ensure all components meet specifications before proceeding․
2․1 Compatible Indoor Units
The MHK2 system is designed to work seamlessly with Mitsubishi Electric’s range of indoor units, including ducted and wall-mounted models․ Ensure your indoor unit is listed as compatible in the official documentation to guarantee proper functionality․ Compatibility ensures optimal performance, efficient energy use, and full-feature access․ Always verify the model numbers and specifications before proceeding with installation to avoid operational issues․
2․2 Necessary Tools and Materials
Ensure you have the following tools and materials before starting the installation:
– Screwdrivers (Phillips and flathead)
– Pliers and wrenches for connecting wires
– Mounting hardware (provided in the kit)
– Cables and connectors for secure wiring
– Power tools (e․g․, drill for wall mounting)
– Safety gear (gloves, goggles)
– Voltage tester for verifying power connections․
Gather all items beforehand to ensure a smooth and efficient installation process․
2․3 Environmental Considerations
Ensure the installation location meets environmental requirements․ The MHK2 system operates optimally in temperatures between 32°F and 122°F (0°C to 50°C) and humidity levels below 80%․ Avoid areas exposed to direct water spray or extreme weather conditions․ Use weather-resistant materials for outdoor installations to prevent damage․ Additionally, consider energy efficiency and ensure compliance with local environmental regulations․ Proper placement enhances system performance and longevity while minimizing environmental impact․
Pre-Installation Steps
Begin by unpacking and verifying all components․ Read the manual thoroughly to understand the system․ Ensure the controller kit is compatible with your indoor unit․
3․1 Unpacking and Inventory
Carefully unpack the MHK2 system components, ensuring no damage․ Verify the presence of all items, including the remote controller, wireless receiver, mounting hardware, and cables․ Cross-reference with the manual’s inventory list to confirm completeness․ Organize the parts to avoid misplacement․ This step is crucial for a smooth installation process and ensures all necessary components are readily available when needed․ Proper organization prevents delays and potential issues during setup․
3․2 Reading the Manual
Before starting the installation, thoroughly read this manual to understand the MHK2 system components and procedures․ Familiarize yourself with safety precautions, installation steps, and configuration options․ Pay attention to diagrams and troubleshooting tips to ensure a smooth process․ Reading the manual carefully helps prevent errors and ensures compliance with manufacturer guidelines․ It is your primary resource for successful installation and operation of the MHK2 system․ Take time to review all sections relevant to your setup․
3․3 Understanding the Controller Kit
The MHK2 Controller Kit includes a remote controller, wireless receiver, and mounting hardware․ The remote allows user input, while the receiver connects to the indoor unit․ Familiarize yourself with the kit’s components and their functions․ Understand wiring connections, power requirements, and communication protocols․ Properly identifying each part ensures accurate installation and operation․ Refer to the manual for detailed diagrams and component descriptions to avoid confusion during setup․ This understanding is crucial for a successful installation process․

Installation Process
The installation involves mounting the wireless receiver, connecting the remote controller, and establishing wiring and power connections․ Follow the manual for a systematic setup process․
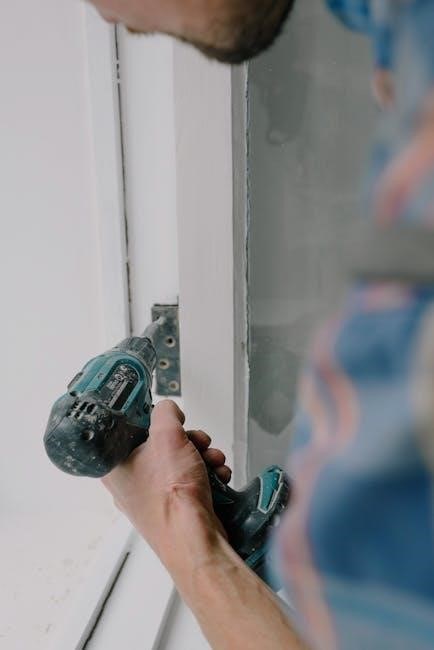
4․1 Mounting the Wireless Receiver
Mount the wireless receiver in a central location to ensure optimal signal strength․ Choose a spot away from obstacles and interference sources․ Ensure the surface is level and secure the receiver using provided screws or adhesive․ Power must be disconnected before mounting․ Align the receiver with the remote controller for proper communication․ Refer to the manual for specific placement guidelines to avoid signal degradation․ After installation, test the signal strength to confirm proper connectivity and operation․ Always follow safety precautions during installation․
4․2 Connecting the Remote Controller
Connect the remote controller to the wireless receiver by aligning the ports and securing it with screws․ Ensure the system is powered off before connecting․ Once connected, turn on the power and test communication; If pairing is required, follow the manual’s pairing procedure․ Ensure proper alignment for strong signal strength․ Verify functionality by testing basic operations․ Consult the manual for troubleshooting if issues arise․ Always maintain a clear line of sight between the remote and receiver for optimal performance․
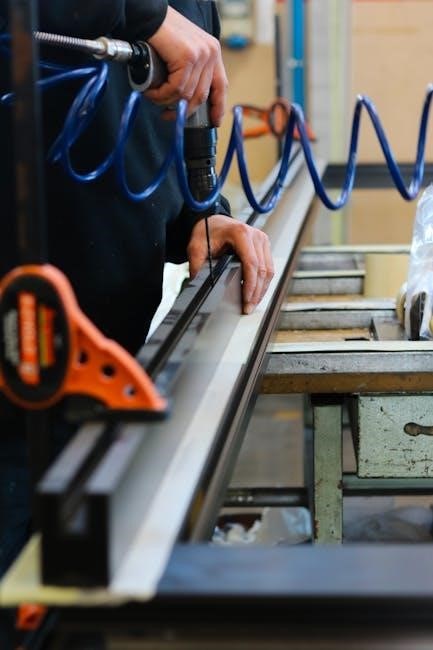
4․3 Wiring and Power Connections
Connect the wireless receiver to the indoor unit following the wiring diagram in the manual․ Ensure all connections are secure and properly insulated․ Connect the power supply to the receiver, verifying the voltage matches the system requirements․ Turn on the power and test the remote controller’s functionality․ Ensure signal strength is optimal for reliable communication․ Refer to the manual for specific wiring configurations and safety guidelines․ Always disconnect power before making any adjustments or repairs․ Ensure compliance with local electrical codes and regulations․

Configuration and Setup
This section guides you through configuring the MHK2 system, including pairing the remote controller, setting operating modes, and enabling advanced features for optimal performance․
5․1 Pairing the Remote Controller
To pair the remote controller with the MHK2 system, ensure the controller is in pairing mode․ Press and hold the pairing button until the LED flashes․ Follow on-screen instructions to complete the pairing process․ Verify connectivity by checking the LED status and system response․ Ensure the remote is properly synchronized for optimal functionality․ Refer to the manual for detailed steps and troubleshooting tips if pairing fails․ Proper pairing ensures seamless control of your HVAC system․
5․2 Setting Up Operating Modes
The MHK2 system supports multiple operating modes, including Heat, Cool, and Auto․ Use the remote controller to navigate to the mode selection menu․ Choose the desired mode based on your climate needs․ The system will adjust settings accordingly․ Ensure the mode is confirmed by checking the LED indicators on the receiver․ For energy efficiency, the Auto mode automatically switches between heating and cooling․ Refer to the manual for detailed steps on configuring these modes and optimizing performance․ Proper mode setup ensures efficient and consistent operation․
5․3 Configuring Advanced Features
Advanced features of the MHK2 system enhance functionality and efficiency․ Access the advanced menu via the remote controller to enable options like scheduling, smart sensors, and energy-saving modes․ Set custom schedules to regulate temperature during specific times․ Enable smart sensors to optimize performance based on room conditions․ Energy-saving modes reduce power consumption without compromising comfort․ Refer to the manual for detailed configuration steps․ Proper setup of these features ensures optimal system performance and energy efficiency․
Post-Installation Checks
After installation, perform a series of checks to ensure proper functionality․ Verify the remote controller operation, check power connections, and test signal strength․ Conduct a thorough safety inspection to confirm all components are secure and functioning correctly․
6․1 Testing the Remote Controller
After installation, test the remote controller to ensure proper functionality․ Press each button to verify it triggers the correct response on the system․ Check the signal strength and ensure there are no communication errors․ Test basic operations like turning the system on/off, adjusting temperature, and switching modes․ If any issues arise, refer to the troubleshooting section or contact support․ Ensure all features work seamlessly before proceeding to the final inspection․
6․2 Verifying Power and Signal Strength
Ensure the MHK2 controller has a stable power supply and the remote controller has a strong signal․ Check the power cable connections and verify the remote’s battery levels․ Test the signal strength by operating the remote from different distances and angles․ If the signal is weak, adjust the receiver’s position or reduce interference sources․ Confirm all functions work smoothly to ensure uninterrupted operation and optimal performance of the system․
6․3 Final Safety Inspection
After installation, perform a final safety inspection to ensure all components are securely connected and functioning properly․ Check for any exposed wires, loose connections, or potential fire hazards․ Verify that the system operates within safe temperature ranges and that all safety features are enabled․ Ensure proper ventilation around the controller and receiver to prevent overheating․ Confirm that the installation area is clear of debris and adheres to safety guidelines․ This step ensures system reliability and user safety, aligning with Mitsubishi Electric’s standards․

Troubleshooting Common Issues
This section addresses common problems during MHK2 installation, such as no power, communication errors, or inconsistent temperature control․ Follow systematic checks to identify and resolve issues efficiently․
7․1 No Power to the Controller
If the MHK2 controller displays no power, first check the electrical connections and ensure the power source is active․ Verify that the circuit breaker hasn’t tripped and all wires are securely connected․ Consult the installation manual for wiring diagrams․ If issues persist, restart the system or contact Mitsubishi Electric support for further assistance․
7․2 Communication Errors
Communication errors between the remote controller and receiver can occur due to signal interference or incorrect pairing․ Ensure the receiver is properly connected and powered․ Restart the system and re-pair the devices as outlined in the installation manual․ Check for physical obstructions or signal strength issues․ If problems persist, verify wiring connections and consult the troubleshooting section for additional guidance․
7․3 Inconsistent Temperature Control
Inconsistent temperature control may occur due to incorrect thermostat settings or sensor malfunctions․ Ensure the remote controller is properly paired and all wires are securely connected; Check for obstructions blocking the sensor’s view and verify that the system is set to the correct operating mode․ If issues persist, refer to the installation manual for calibration instructions or contact a certified technician for assistance․

Maintenance and Upkeep
Regularly clean the remote controller and ensure proper battery replacement․ Update the firmware periodically and check for dust accumulation in sensors to maintain optimal performance․
8․1 Cleaning the Remote Controller
To maintain optimal performance, regularly clean the remote controller using a soft, dry cloth․ For stubborn stains, dampen the cloth with mild detergent, but avoid harsh chemicals or abrasive materials․ Gently wipe the buttons, screen, and exterior surfaces․ Ensure no moisture seeps into the device․ Allow it to air dry completely before use․ Regular cleaning prevents dust buildup and ensures reliable operation․ This simple maintenance step helps extend the lifespan of your MHK2 remote controller․
8․2 Updating Firmware
Regular firmware updates ensure your MHK2 remote controller operates with the latest features and improvements․ Visit the Mitsubishi Electric website to download the newest firmware version․ Transfer the update to a USB drive, insert it into the controller, and follow the on-screen instructions․ Do not disconnect power or interrupt the process during the update․ Once completed, restart the controller to apply the changes․ Always verify the update source to avoid unauthorized or incompatible software․ This ensures optimal performance and compatibility with your system․
8․3 Battery Replacement
To replace the battery in your MHK2 remote controller, first locate the battery compartment on the rear or bottom of the device․ Open it using a screwdriver if necessary․ Ensure the replacement battery matches the type specified in the manual, typically a CR2032․ Insert the new battery correctly, close the compartment, and test the remote to confirm functionality․ If the clock or settings were lost, reset them as needed․ Proper replacement ensures uninterrupted operation and optimal performance of your MHK2 controller․
This concludes the MHK2 installation manual․ Properly following the steps ensures optimal performance and efficiency․ Refer to the manual for any future adjustments or troubleshooting․
9․1 Summary of Key Steps
The MHK2 installation process involves several critical steps, including unpacking, reading the manual, and understanding the controller kit․ Mounting the wireless receiver, connecting the remote controller, and ensuring proper wiring are essential․ Configuration includes pairing the remote and setting operating modes․ Post-installation checks, such as testing the controller and verifying power, ensure functionality․ Troubleshooting common issues and regular maintenance, like cleaning and updating firmware, are crucial for long-term performance․ Always refer to the manual for specific guidance and optimal results․
9․2 Final Tips for Optimal Performance
For optimal performance, ensure regular maintenance, such as cleaning the remote controller and updating firmware․ Always verify power connections and signal strength․ Familiarize yourself with advanced features to maximize efficiency․ Refer to the manual for specific settings and troubleshooting guidance․ Proper installation and adherence to safety precautions are crucial․ Contact Mitsubishi Electric support for any unresolved issues․ Regularly inspect wiring and connections to prevent disruptions․ Understanding the controller’s operating modes will enhance user experience and system efficiency․

References
For additional details, refer to the MHK2 Installation Manual PDF․ Contact Mitsubishi Electric support for further assistance and technical inquiries․
10․1 Additional Resources
For further guidance, visit the official Mitsubishi Electric website for detailed PDF manuals and technical support․ Explore the MHK2 FAQ section for answers to common questions․ Additional training materials and troubleshooting guides are available on the Mitsubishi Electric HVAC resources page․ These resources ensure optimal system performance and address specific installation or operational queries․
10․2 Contact Information
For inquiries or assistance, contact Mitsubishi Electric HVAC US LLC at support@hvac․mitsubishielectric․com․ Visit their official website at https://www;mitsubishielectric․com for more details․ Their office is located at 5900-A Katella Ave, Cypress, CA 90630․ Call toll-free at 1-800-926-3000 for immediate support․ Office hours are Monday–Friday, 8 AM–5 PM EST․ Reach out for technical support, warranty inquiries, or product-related questions․
FAQ
Frequently Asked Questions about the MHK2 installation process, troubleshooting, and system operation are addressed here for quick reference and resolution of common issues․
11․1 Common Questions
Users often inquire about pairing the MHK2 Remote Controller with indoor units, resolving no-power issues, and addressing inconsistent temperature control․ Other common questions include understanding wiring diagrams, troubleshooting communication errors, and ensuring proper signal strength for wireless operation․ Additionally, queries about firmware updates, battery replacement, and compatibility with Mitsubishi Electric systems are frequent․ Refer to the manual for detailed solutions to these and other issues․
11․2 Solutions to Frequently Encountered Problems
For no power issues, ensure connections are secure and power sources are activated․ Communication errors can be resolved by resetting the system and verifying receiver pairing․ If temperature control is inconsistent, check sensor calibration and settings․ Refer to the manual for detailed troubleshooting steps․ Contact Mitsubishi Electric support for persistent issues․ Always ensure proper installation and configuration for optimal performance․
Leave a Reply